Saturday, December 1, 2012

Master Bedroom


The master bedroom is huge.  I love having this much space.  Originally the walls were white and the moldings were a pale yellow.  The drapery on the windows were very nice and heavy, but I couldn't make them work with the new color scheme.


I painted the bedroom walls a very pale yellow (Aged Hazelnut, I think) and the moldings white. I decided to go with brown curtains.


Friday, November 16, 2012

Master Bath-entry

Well, it's much harder to work on the house when you live in it. We have worked on it some, but nothing that was overly exciting. Until now...

The master bathroom is two rooms. I started working on the smaller of the two first, the entry room.

The very pale pink striped floral design wallpaper wasn't for me.  (However, I have grown very fond of the drop globe glass light fixture, the glass globes hang on either side of the sink/mirror.)


I changed out the pulls on the bi-fold doors with Cream Crackle Ceramic Scallop Knobs from Hobby Lobby.  It made the bi-folds bearable.
Cream Crackle Ceramic Scallop Knob

I decided to cover the wallpaper with brown craft paper.  I found some detailed instructions with just a quick internet search.  Holly and I loaded up and headed to Wal-Mart.  We picked up a few rolls of Duck Brand Kraft Paper and some Zinsser Universal Wallpaper Adhesive.


Before I began working on the walls I went ahead and painted all of the trim white to match what is in the master bedroom.  The trim was a pale yellow before, painting it white made everything look cleaner.  And by painting the trim before I put up the wall covering I didn't have to tape anything off. Yay!

As I was letting the trim paint dry, I read through the instructions again. Here is a combined version of their instruction and some of my additions.

  1. Tear a strip from the brown paper roll (most of my were somewhere between six and nine inches)
  2. Tear pieces off in any shape that you desire (I did most of mine square or rectangular with a few odd balls.  I could get about five pieces from each strip I tore.)
  3. After you tear off a piece wad it up like a trash ball.  Make two piles, one for your pieces with all torn edges and one for your pieces with straight edges from the roll.  You will use the straight edges to put along the ceiling and and trim you butt up against.  This makes a nice clean line at your edge.
  4. After you get a nice collection of wadded up paper, start opening them up and pull out any edges that are bent under.  The creases in the the paper piece will give you texture on your wall. 
  5. I started on an area that butted up next to some trim, using my pieces with a straight edge. (See picture below.)
  6. I used a paint brush to apply the adhesive to the wall (I put mine directly on top of the existing wallpaper).  
  7. Make sure to get your edges down and lightly go over the piece of paper so that it is securely glued to the wall, you will still be able to see the creases as long as you don't use too much adhesive and stretch the piece out. 
  8. Don't worry, I had never done anything like this and it was not hard to figure out the right amount of adhesive or how much to press on the piece to make sure it was up there well enough.
  9. After I got all the way up the piece of trim with the straight edges I started using the pieces with all four sides torn.  I didn't put them in any particular order.  I just made sure I didn't see any of the old wallpaper coming through.  I preferred a more random look/pattern, but I think that's all up to you.

Like I stated in #5, I stared with my straight edge pieces next to a piece of trim.
After I went up the trim and across the counter top with straight edge pieces I started filling in with the all torn edge pieces.
I went all the way round the door trim with straight edge pieces.

Now, reverse a little bit, while we were in Wal-Mart looking at polyurethane I stopped to look at the hammered spray paint (again).  I just can't seem to say no to that stuff!  So, I bought two cans of the Rust-oleum Hammered spray paint in Copper color to redo the counter tops (similar to those in the kitchen).


I had to test a little spot last night.  So far, I think I am going to like it!

This picture was taken Friday morning; you can still see areas that are not completely dry.
Full view of the area surrounding the door.


6 days later... I love the way it looks, even with the differences in color from the adhesive.


A panoramic of the entire room.  I still need to decide on a color for the cabinets, but for now I'm pleased with the results.

Wednesday, October 24, 2012

Faceplate Project

So today I saw something on Pinterest (love me some Pinterest right now!!) on covering faceplates with scrapbook paper. I thought I'd give it a try.

It's so easy!! I cut out the paper slightly larger than the faceplate. Then using mod podge and a sponge brush, I applied a thin layer of mod podge to the face plate and smoothed put any bumps. I folded the edge over and made sure it had plenty of mod podge to stick. Let that dry completely.


When the first part is dry I brushed a thin layer of mod podge over the surface. In this project, I used matte mod podge (even though glossy would look good too, I was just going for a matte look). Make sure the entire surface is covered evenly don't use too much, if your paper is then it might soften it. Let that dry.


When the faceplate is completely dry, using an exacto knife, carefully cut the holes for the plugs/switches.


This took me less than an hour to do four different sized faceplates. I love the way they look on the wall. In Holly's bathroom I spray painted the switches a cream color.  I couldn't figure out how to get them clean with out fearing I might electrocute myself. :)

(Tonight I am going to paint the tips of the screws cream also.  I didn't think of that at the time. :)

Before and After...

Before
After

Sunday, October 21, 2012

First Night...

Well, this is the first night in the new house. Holly started out in her room, but didn't last long. To be fair, it's dark, pretty quiet, on the warm side (up there) and probably the biggest reason... it's too far from me! :)

We got so much done this weekend. I'm so thankful for all of the family and friends that have helped!! I love you!

As I sit on the sofa I'm very pleased with my view. (Can't wait to get the final coat of paint on and take down the blue tape.) But over all... SO HAPPY!!!

View from the sofa (first night)

First morning... As much as I did not want to get up, it was great to be in the new house.  Holly slept well and woke up happy happy.  On our way to school, she asked if we could stay in the new house every night.  :)

Tuesday, October 16, 2012

Holly's Room(s)...

The upstairs consists of two rectangular rooms and one small, but full bath.  We figured this would be perfect for Holly so she could sing and dance all she wanted in her own space.

We started out with white walls, yellow light fixtures and yellow/green shag carpet.


General use room... upstairs
Holly's bedroom


This was actually the first area that we started working on the night we closed on the house.  We wanted to get Holly's area finished so she could have her own space while we worked on the downstairs.

For the girly girl, we went with a pink bedroom.


Tearing it down!

We went with a light grey for the general room.  Both rooms got laminate floors from Ikea.

Bradly and Erin ... Hard at work


General Use Room after photo

I love the way they turned out!


Here's a picture of her room with the closet doors up and a few of her room things moved in.


Monday, October 15, 2012

Tearing apart the lovely living room...

I love the size of the living room, it is amazing.  There was lots of dark paneling and carpet needed to be replaced. The previous owner had lots of animals and I didn't want our animals attempting to cover up their scent! The first weekend in the remodel we decided pulling out the carpet was a must.. And we had lots of eager helpers!

This is the original view from the front door.  


And underneath the carpet we discovered wood floors.


(Dedicated helpers Erin and Heather...)


For several weeks we wrestled over what to do with the floors. The large area that separated the two rooms and direction of the wood played a large part in the decision. We decided to go with laminate floors. I knew if we had to refinish the floors we might never get moved in. So off to Lowe's we went and back home we came, Swiftlock Handscraped Hickory  in the truck.

Handscraped Hickory


Bradly putting down the floors...


We hit the living room hard on Saturday and Sunday... putting up sheet rock, painting, cleaning.  I'm pretty sore this morning.

Frani enjoying the new floor and admiring the tape and bed job.
We had a tough time trying to figure out if we should change the molding color or leave it wood colored, because of the ceiling beams.  So we decided to split it.  We are going to try it out for a while and see how we feel about it.  The color we picked for the living room is Furry Otter Tail.  
The entryway. 
View from the sofa
I am not crazy about the entry spindles on the half wall, but until we decide what to do with them, I guess they'll stay.  But this picture shows the two tone molding better... we did everything below the ceiling white and left the ceiling wood.  (12/14/2012 Update:  The spindles have grown on me, like many things I thought I wouldn't originally like have done.  And I love the way the molding looks, I'm so glad we didn't touch it!)


...Update (01/02/2013)

We have finally completed the majority of the work in the living room.  I have added a few pillows and rugs with plenty of color since the room itself is so brown.  I love how it has turned out.


(To be continued..)

Kitchen .. Redo!

This is one of my favorite rooms.  I know there were many good meals cooked in this kitchen before me.  I was ready to attack it and make it my own.  I was ready to start my own memories.  

I started in the morning, taking off the cabinet doors, instead of cleaning the hardware, I decided to trash it and go with something new.  I cleaned the cabinets with Simple Green, sanded them, and cleaned them with alcohol.   I brush painted the doors, which was a bad idea.  I started that around 10 in the am and finished the next day, and that was even with the help of my friend, Heather, for three hours that evening.

The next day, my dad came to help me spray the cabinet bases.  That was much easier and made me really regret spending 8 plus hours painting with a brush.

Going from dark wood to bright white totally gave the kitchen a new look.  We bought bronze/black pulls and hinges (make sure you know which to get.. we got the wrong ones) and it really pulled it together.

Hint: If you have a lot of cabinet doors, MARK them so you know where they go when it's time to re-hang them.  Playing guess the cabinet is very frustrating! :)


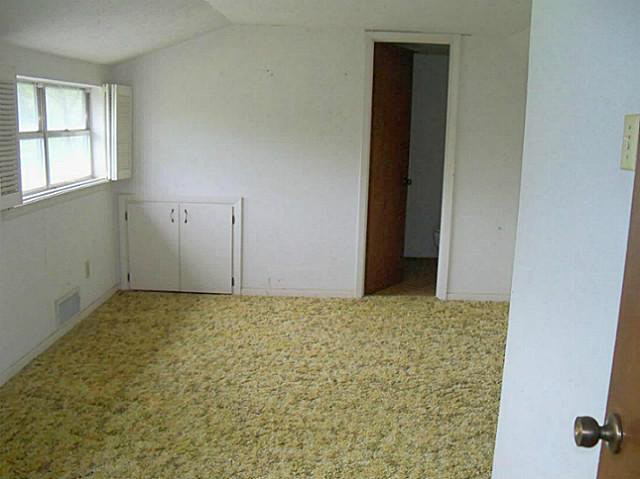
Above is where we started. This picture shows about 2/3 of the cabinets... Way to many not to have labeled!

We purchased the faux tin back splash from Lowe's which were approximately $20 each, and the hinges and pulls were roughly $3.00 each. These pictures don't show pulls on the cabinet doors because they don't exist yet, our Lowe's was out of them and we haven't gone back to get more. :)

At first we thought that the yellowish counters would work until we found a tile we liked.  But while on one of our multiple trips to Walmart we decided to buy some Hammered spray paint and see what we could play with... which led to the below outcome...


Aged Bronze Hammered spray paint, $4.00 a can.  Looks amazing.  Bradly and I cleaned the tops, taped off the back splash and cabinets VERY carefully, sanded them, cleaned them with alcohol (we like cleaning with alcohol) and let loose about four cans on the counter tops.

I am VERY happy!!

...Update (01/02/2013)

I finally painted the remaining wall in the kitchen.  I had purchased a gallon of paint in the return section a few years ago and decided to use it on the half wall.  I thought it would be a silvery color, but it turned out much more green than I expected.  It's not bad.  I can live with it for now.


Thanks to Uncle Iryn, we finally got a refrigerator.  We were going to go with a white front older model that my dad had in storage, but we lucked into a newer, stainless front, and more energy efficient model.  I think it matches the tile back splash and looks amazing!